How to add Android “app shortcuts” to a FMX application
Starting with Android 7.1 (API Level 25, supported out of the box by Delphi 10.3 Rio version) there is a new functionality supported by the OS (specifically by the OS app launcher and most of alternative launchers as well): app shortcuts. You can find all details about this Android capability at this location of the Android’s official documentation.
Why deal with app shortcuts?
Shortcuts can be very helpful when the application includes one or more main activity and the user may benefit having a specific shortcut to start your application and jump to that specific activity within your app. Also consider that most launchers (starting with the default one) will let the user have this shortcuts at hand by long-pressing the app’s icon, with an opportunity to create app-like icons on the home screen to trigger the shortcuts.
Example of popular apps with shortcuts: GMail, Google Maps, WhatsApp, Hangout, Slack and many more (and starting today, maybe yours too :-)…
During a one-to-one training session on FMX mobile development, one of my customers asked for this specific functionality (introduced with Android 7.1 Nougat, late 2016) to be implemented in a FMX app, so I delved a bit into this topic (that also has a sibling on the iOS side named “3D touch”, introduced in 2015 with iOS9).
In this blog post we’ll see how to add static shortcuts to your Android FMX application, through 4 simple steps. I plan to expand more on this topic (probably in my coming FMX book or during some of my mobile development workshops, held in my office in Italy or at Delphi events like Delphi Code Camp, scheduled for next May 8th in Koln, Germany), covering dynamic shortcut generation and the iOS side as well.
For now, we’ll start with an empty FMX app and we’ll add one static shortcut to the app.
Step 1: Edit your Manifest.xml file
Better said, edit your AndroidManifest.template.xml file, adding the following line inside the activity tag, just after the closing tag of the intent-filter element.
        (...)
    </intent-filter>
    <meta-data android:name="android.app.shortcuts" android:resource="@xml/shortcuts" />
</activity>
The AndroidManifest.template.xml file will be used by the IDE to compile the actual Manifest.xml file that will be shipped within the final APK. The app launcher of your user device will look for this piece of information in order to describe app shortcuts for your app.
Basically we are just introducing a reference to an other XML file (shortcuts.xml) we are going to create in a proper folder as we’ll see in the next step.
Step 2: Create your shortcuts.xml file
As we’ll see later, it does not really matter where on your file system, but for example you can place it in your project root folder, just aside of the AndroidManifest.template.xml that IDE should have created for you.
<?xml version="1.0" encoding="utf-8"?>
<shortcuts xmlns:android="http://schemas.android.com/apk/res/android">
  <shortcut
    android:shortcutId="myshortcut1"
    android:enabled="true"
    android:icon="@drawable/andreamagni_128"
    android:shortcutShortLabel="@string/my_shortcut1"
    android:shortcutLongLabel="@string/my_shortcut1"
    android:shortcutDisabledMessage="@string/my_shortcut1_disabled">
    <intent
        android:action="android.intent.action.MYACTION1"
        android:targetPackage="com.embarcadero.Project1"
        android:targetClass="com.embarcadero.firemonkey.FMXNativeActivity"/>
    <categories android:name="android.shortcut.conversation"/>
    </shortcut>
</shortcuts>
Please note:
- You’ll need to provide a unique (within your app) shortcutId value, a string literal (not a re;
- The values for the shortcutShortLabel (preferably less than 10 characters) and shortcutLongLabel (preferable less than 25 characters) are references to resource strings (we’ll see in next step of this blog post how to provide a value for these entries);
- there is an intent element, where you can specify the action attribute. This information will be then included in the intent information your app may inspect to determine which shortcut has been triggered;
- again the same intent element has a targetPackage attribute that must match the application package name (so please be sure to change this value accordingly to your Delphi project’s name);
- the categories element is a bit of a mistery to me so far: as far as I understood (see this page) there is only one admitted value (conversation) and it has been introduced with API level 25 (there should be more values available in later API levels).
- the icon attribute has a value “@drawable/andreamagni_128”: I am going to use a 128×128 PNG file (with one of my profile pictures) as icon for our shortcut, we’ll see later how to include the actual PNG in the APK.
Step 3: create your strings.xml file
Again, it does not really matter where on your file system, but for example you can place it in your project root folder, just aside of the AndroidManifest.template.xml that IDE should have created for you and the shortcuts.xml file created at step 2.
<?xml version="1.0" encoding="utf-8"?>
<resources>
<string name="my_shortcut1">Andrea</string>
<string name="my_shortcut1_disabled">Shortcut is disabled</string>
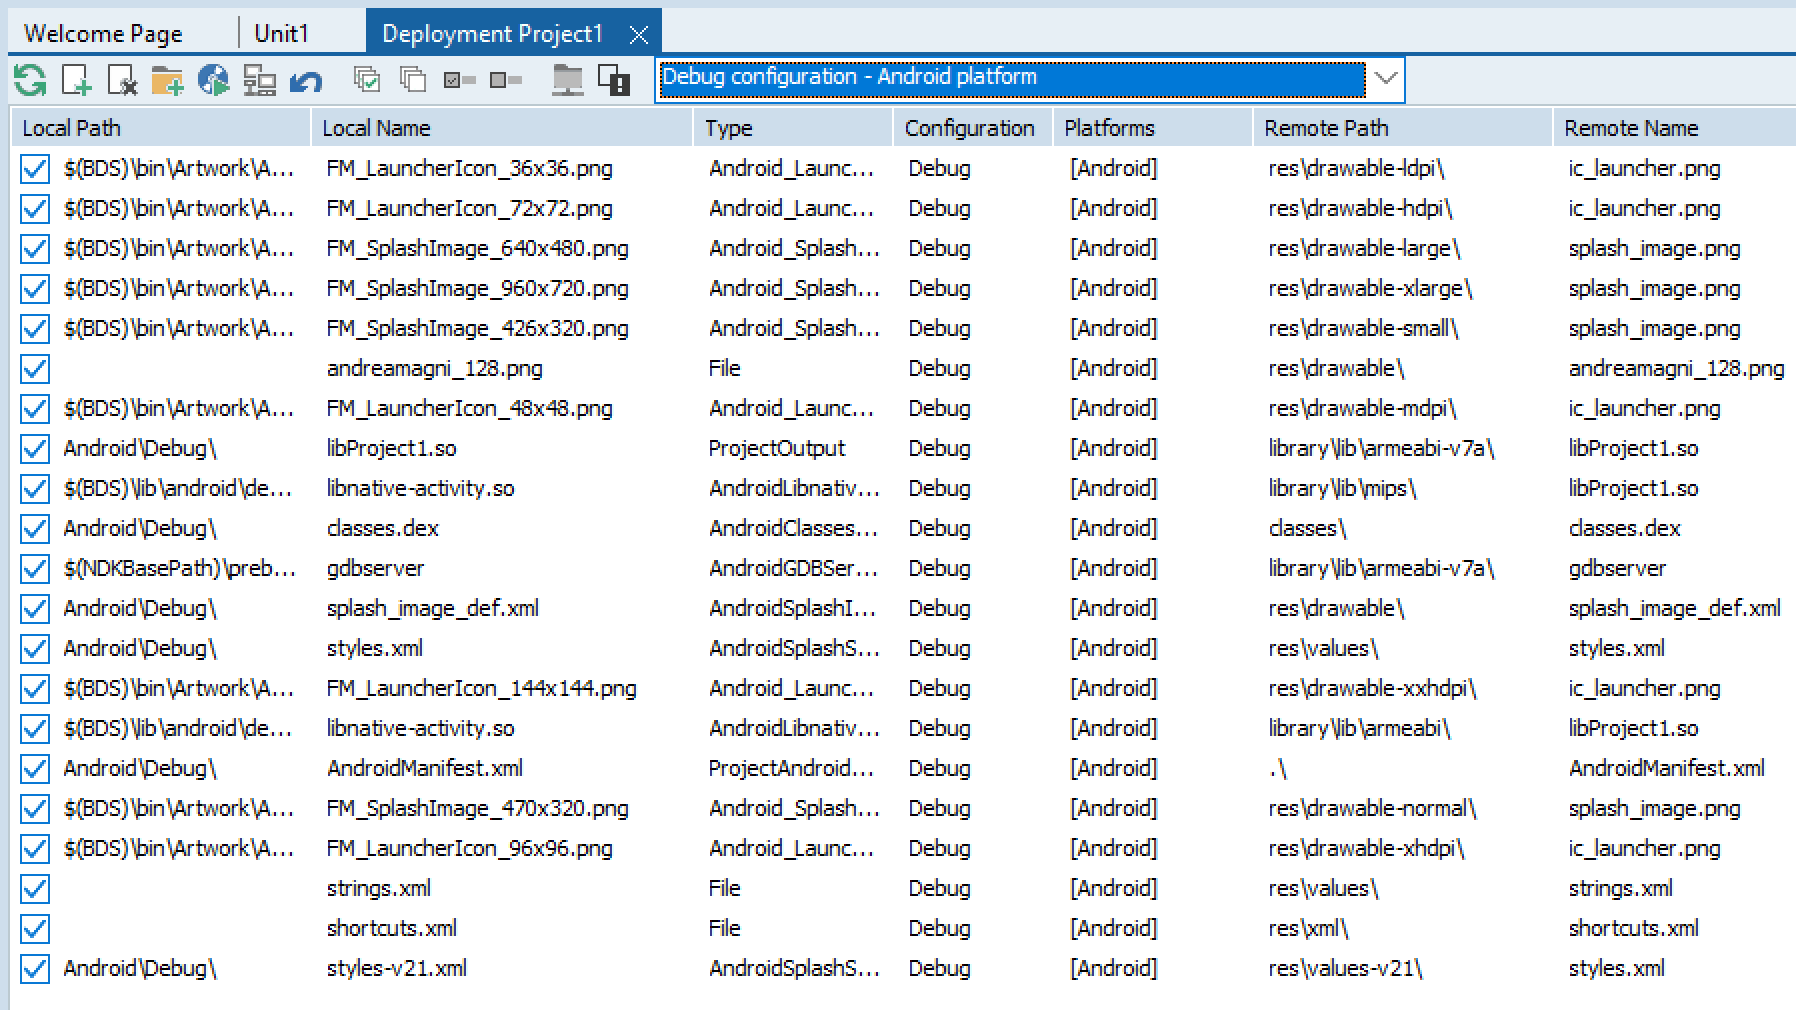
</resources>Step 4: configure Deployment
Now that we have created these two additional xml files (shortcuts.xml and strings.xml) we need to correctly include them in the final deploy (build of the APK). We can add them in the Deployment page of the IDE (Project –> Deployment) and manage their deployment for the Android platform.
Please note:
- the platform/configuration combo box shows “Debug configuration – Android platform” (you may want to select “All configurations – Android platform” entry) before adding the two xml files and the PNG file to the deployment file list (using the second toolbutton);
- I’ve edited the “Remote Path” value specifying “res\values\” for the strings.xml file and “res\xml\” for the shortcuts.xml file (no quotes);
- the entry for the andreamagni_128.png picture has “res\drawable\” as “Remote Path” value.
That’s all… really?
No, not really. But it is all that is required to actually define (static) shortcuts for your app.
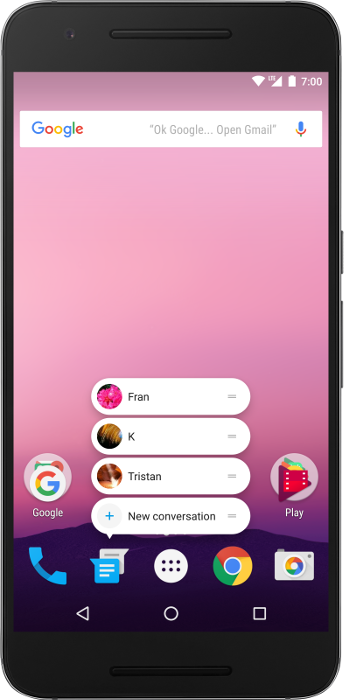
If you build&deploy this application on an Android 7.1+ device, with a shortcut-enabled launcher (my Nexus 5X with the default launcher for example) you’ll be able to long-tap on the app icon and have shortcuts displayed.
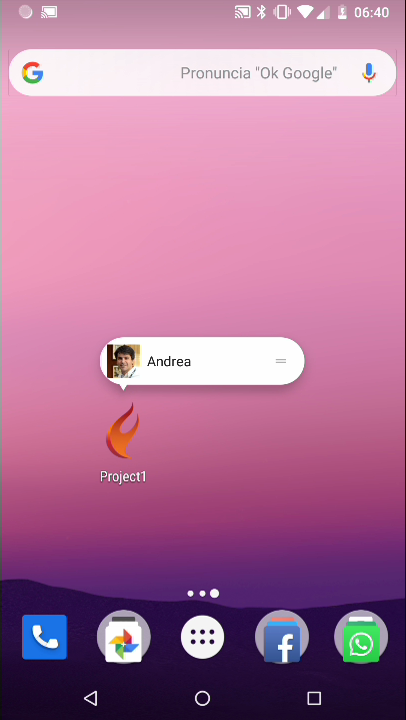
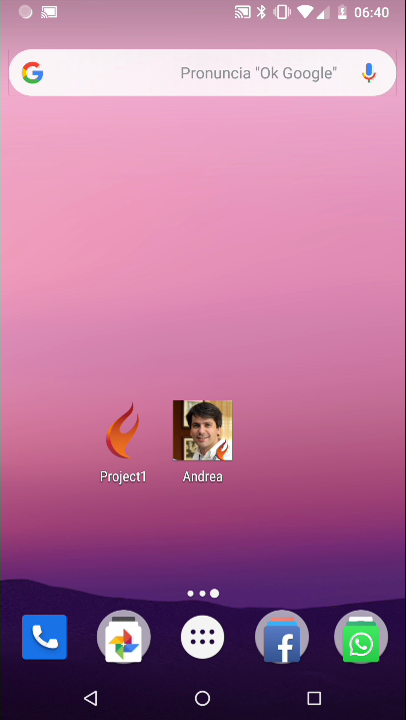
You can even drag the shortcut on the home screen to have a separate icon on the screen to trigger your shortcut.
Here is a short video showing how to display the shortcut list and drag one of the shortcuts to the home screen in order to create a permanent icon for the shortcut.
Now you may be asking yourself how to handle shortcuts at the application level, meaning how to know if your app has been started normally or through a certain shortcut.
Handling the shortcut in the app
In order to know how your app was started (with or without a shortcut triggered), you can check the action value of the intent called by the OS to launch your app. It will contain the value specified as action attribute for the triggered shortcut (if the app has been started through a shortcut), in our case it would be “android.intent.action.MYACTION1”. The following code is a very basic example how to reach this value:
uses
  Androidapi.JNI.App, Androidapi.JNI.JavaTypes,
  Androidapi.Helpers;

procedure TForm1.FormCreate(Sender: TObject);
begin
  Label1.Text := 'S: ' + JStringToString(
    TAndroidHelper.Activity.getIntent.getAction
  );
end;
It’s up to you then to handle the situation from an application point of view. If your app has multiple views (i.e. has a tab control on it, you may want to show a specific item, load some specific data, perform an action…).
If you want to try it yourself, here is a compiled APK of the project used for this blog post (you’ll need to enable external sources on your device in order to install):
Conclusion
App shortcut are a powerful functionality of Android operating system and can be very useful in business applications. They can improve general usability of your app as you can provide a handy and quick way to get to some functionality built-in your app.
There are a number of topics around this first/basic example I’d like to delve a bit more into but time is limited and my working schedule hard. So I hope you enjoyed this and please let me know if you have any questions about this.
Sincerely,
Andrea
Con delphi rio non compila da l’errore:
Error: No resource found that matches the given name (at ‘shortcutShortLabel’ with value ‘@string/my_shortcut1’).
No resource found that matches the given name (at ‘shortcutLongLabel’ with value ‘@string/my_shortcut1’).
No resource found that matches the given name (at ‘shortcutDisabledMessage’ with value ‘@string/my_shortcut1_disabled’).
e in deploy risultano due strings.xml uno che inserisci tu ed un altro se disabiliti quello standard si compila ma appena si avvia l’app va in crash